
Hey Everyone!
Like many of you, Fall is fast approaching and I
decided to revive and share a more in-depth tutorial
about how I create these darling Clay Pot Scarecrows.
Come Join Me in the FUN!

SUPPLY LIST:
5 Clay Pots (for boy)
4-5 Clay Pots (for girl)
(POTs can be any size you wish)
Acrylic Paints/Sealer
Buttons, Trims etc.
E600 or Household Glue
Thin Sharpie
Being an AVID crafter and artist I never do these
in the same colors...your imagination is your only limit.
BELOW:
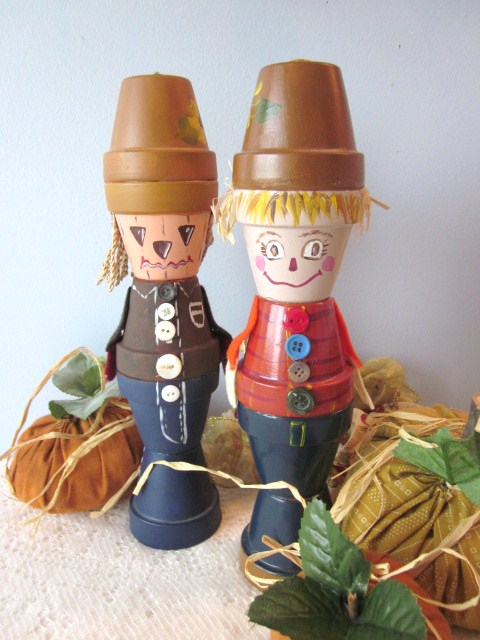
I decided since I create in a world of shabby chic
I would show you the ones I recently made up in those colors.
Also, I came up with a *Girl* scarecrow this time...
thought she turned out so darling!

DIRECTIONS:
Select the size of Clay Pots you want to use. I am Using
in this tutorial 3 inch pots. I got these at Hobby Lobby, stacking
as you see in #1 of the 4 pix below.
These were priced at $2.99, used their 40% coupon
so they ended up at $1.79.
2. Determine the colors you will be using, then paint
as follows:
BOY
a. bottom 2 pots Pant color
b. 3rd Pot color Shirt
c. 4th Pot is face
I use a flesh tone but any light color can work
d. 5th Pot is for Hat
GIRL
a. 2-3 Pots Painted for Skirt.
(These 2 pots need to be slightly different in
size so that they stack correctly. Larger on Bottom
then smaller on top)
b. 3rd Pot Shirt color
c. 4th Pot hat color
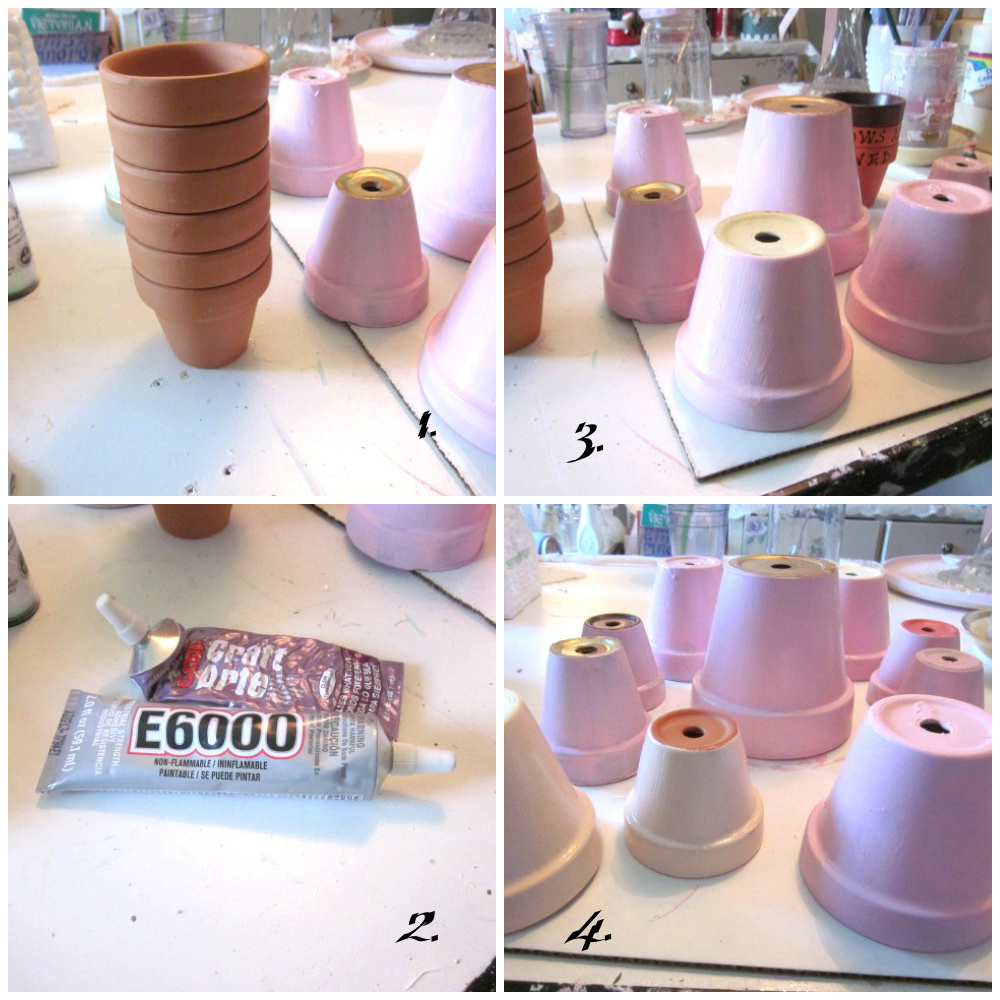
Now to begin assembling and gluing your pots on to of
each other. You can see how to start below. You begin
with the wider opening part as your base.
I glue all around each
edge making sure they are secure.
Continue to stack until you have them stacked
as you see in the bottom two
pictures of the 4 pix below.

NOW the Fun begins!
I always do a few faces up before I decide how I want
it too look. Then using a fine tip Sharpie I added the
faces to the boy and girl.
For the arms, I did up a template. Using Felt I had
in a fleshy tone I made 2 sets for hands, and in the
pink I did 2 up for the arms.

Once the faces are on, I seal the entire piece.
I then gather my embellishments...
buttons, ric~rac, lace and ribbon.
For my girl, I painted my roses all around
her skirt. On the boy, you can see faint detailing that I did
to mimic a shirt. I uses some light fringe trim I had to mimic
hair...but you could use fringes, straw etc. as well.
There is NO right or wrong way to do these.

Below I am showing you some done up in more traditional
Fall Colors. Each one is so different and I had fun with
the trims as well.

I also have done them in larger pots as you can see
from my picture below.

These pots can also be painted to look like toy
soldiers, as I have done below. I pull these sweeties
out during the holiday and place by my door.

If you have any questions, or need clarification, please
do not hesitate to ask.
I hope you will consider doing
these, they are so cute, easy and fun to do.
A great, inexpensive craft to do with children as well.
Thanks so much for stopping by,
I treasure your comments!

PS. I am selling the pink set in my etsy shoppe!
I'd be happy to make up a set for you!
I am Linking to:
The Scoop over a White Lace Cottage this week!
1 comment:
Oh my these are adorable, you should sell them in your shop!!!
I know I would purchase them :)
Smiles~
Mari
Post a Comment